-
AuthorPosts
-
-
Gen 3-4 Viper window regulator R&R
The window regulators are a very common problem with the generation 3-5 Vipers. As many people have come to discover, removing the door panel is the hardest part with this repair for the third and fourth generations. We are going to provide you with some tips to remove the door panel without causing damage to the door trim that commonly gets damaged upon door panel removal. THIS REQUIRES CARE AND PATIENCE!
Tools required are:
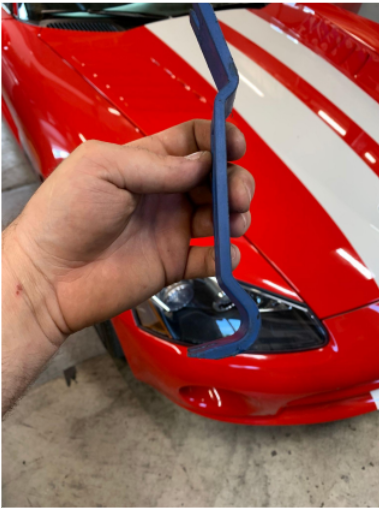
Phillips screwdriver, pick tool, ¼” ratchet, 3/16 hex socket, 10MM socket (magnetic socket optional), trim tool (see picture 2)
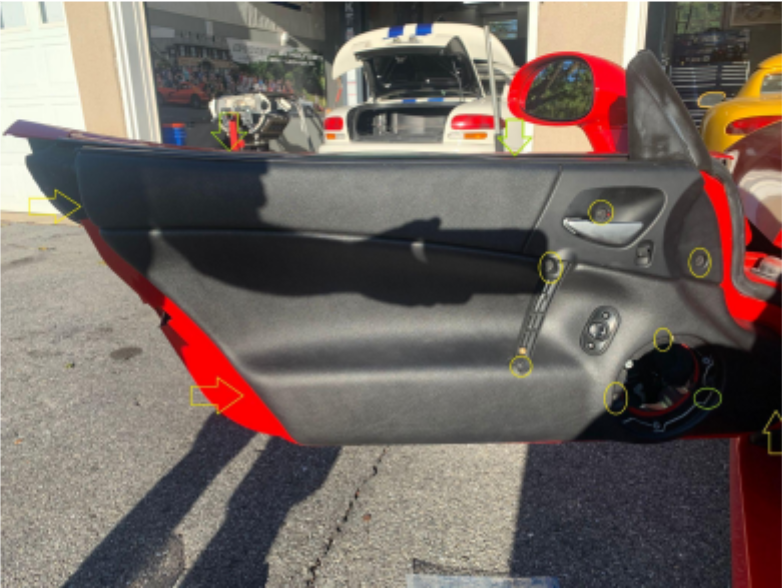
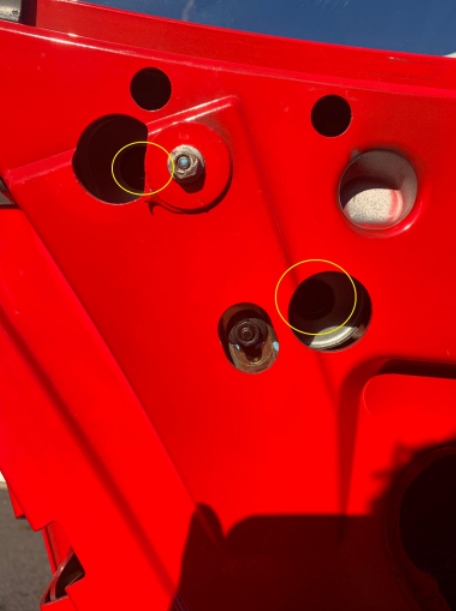
1. Begin by removing the door panel. To remove the door panel you will need to remove the 3 screws holding the speaker in, remove the silver metal door handle cover by removing the hex head socket bolt, remove the 3 push pins on the side of the panel (Yellow arrows picture 1) and the 7 phillips screws (Yellow circles picture 1). NOTE: To remove the push pins on the side of the door panel push the center of the pin in one click.
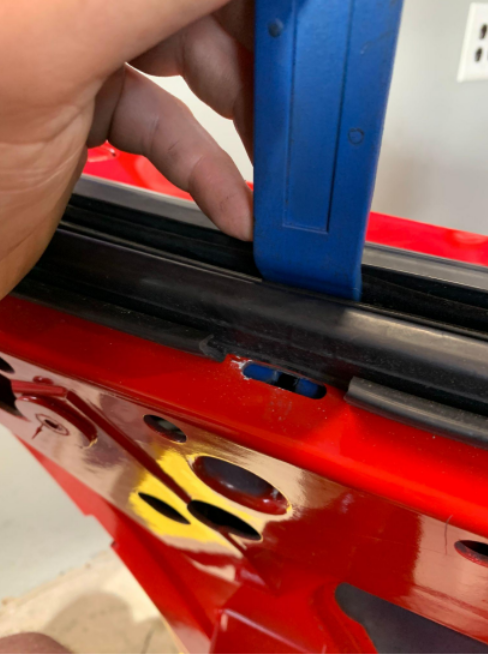
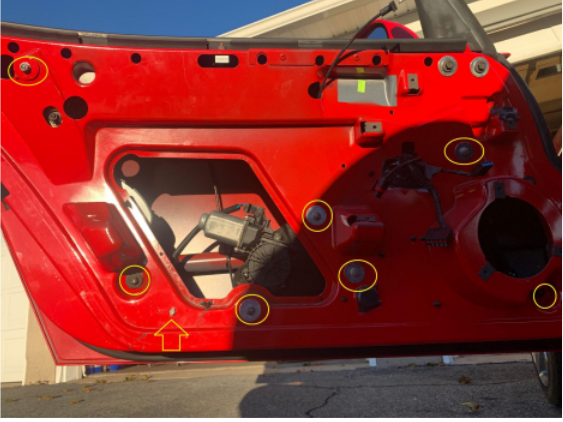
2. The only thing holding the door panel to the door at this point are the two metal clips that attach to the black trim piece on the door panel. To release these clips you will need the trim tool seen in picture 2. To locate the clip locations stick your finger between the window seals and run your finger along the trim pointing towards the door panel and you should feel the clips. Using the trim tool, carefully push the bottom of the clip towards the door panel while very carefully pulling the bottom of the door panel outward slightlying and working the panel upward. (Picture 3). It’s easier to start with the outer clip first. Once the first clip comes up and out, do the same on the inner clip. Remove electrical connectors and door handle cable. The window controller can either be removed from the door panel to access the connector or removed from the backside of the panel
3. Once the door panel is removed you will need to remove the window. Remove the inner window seal. While looking into the speaker hole, lower the window down until you see the clip that is holding the window to the inner window track (Picture 4). Use a pick tool and pull the clip away from the window track being careful to not lose the clip. Roll the window all the way up until you see the two black bolts for the window on the outer track (Picture 5). Having a magnetic 10MM socket will make it easier to not drop and lose these bolts. While having an assistant hold the window glass remove the 2 window bolts and pop the inner window track holder out. Lift and remove the window.
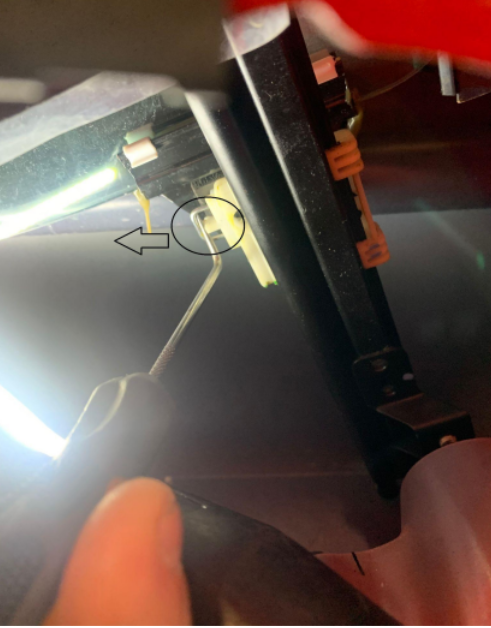
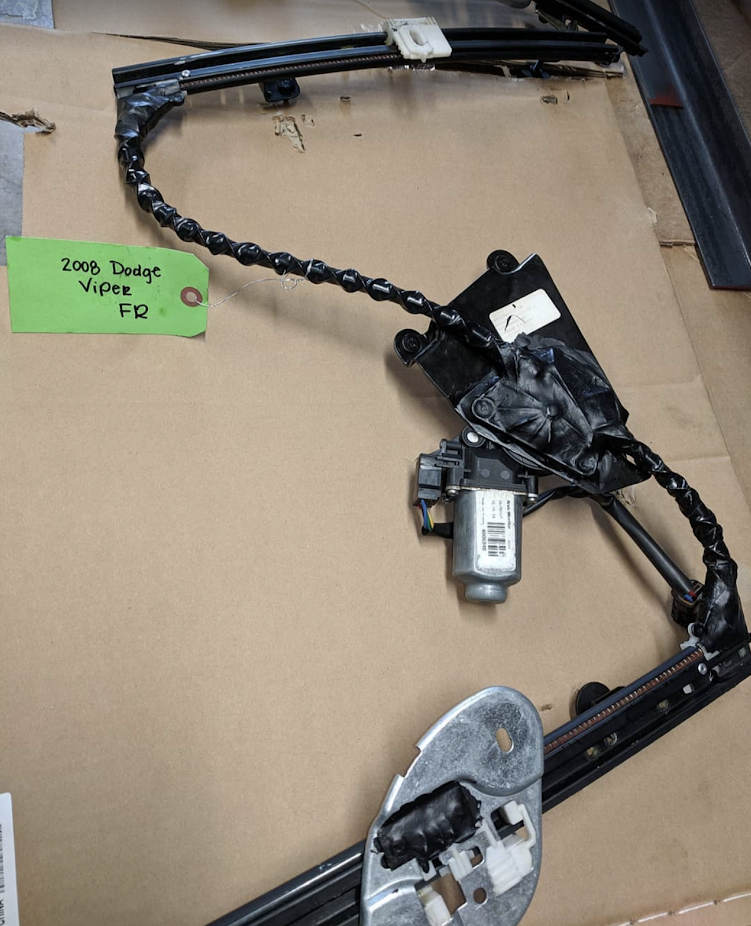
4. Remove the vapor barrier covering the window motor. Unplug the electrical connector for the window motor. The connector is located where the while clip is next to the window motor (Yellow arrow picture 6). Remove the 7 nuts holding the window regulator and track assembly (Picture 6). Once the motor and track mounting hardware are removed, push the assembly towards the front of the door making sure not to catch or damage the cable and wiring in the door. Remove the outer track first and pull the rest of the assembly out.
5. Install the window motor and regulator assembly in reverse order as removal.
Send your old regulator to https://powerwindowrepair.com/ they rebuild it, reinforce it and wont fail like the factory ones.
a full youtube video on the how to is also below
-
-
AuthorPosts
- You must be logged in to reply to this topic.